
Taking a screenshot on Mac is one of those essential skills that every user should master. Whether you need to capture an important email, save a moment from your favorite video, or share a funny meme with friends, knowing how to take screenshots efficiently can make life easier. With macOS offering various options for capturing images and even recording your screen, it’s time to explore the ins and outs of this handy feature. Let’s dive into the world of screenshots on Mac and unlock its full potential!
How to Take Screenshots on a Mac
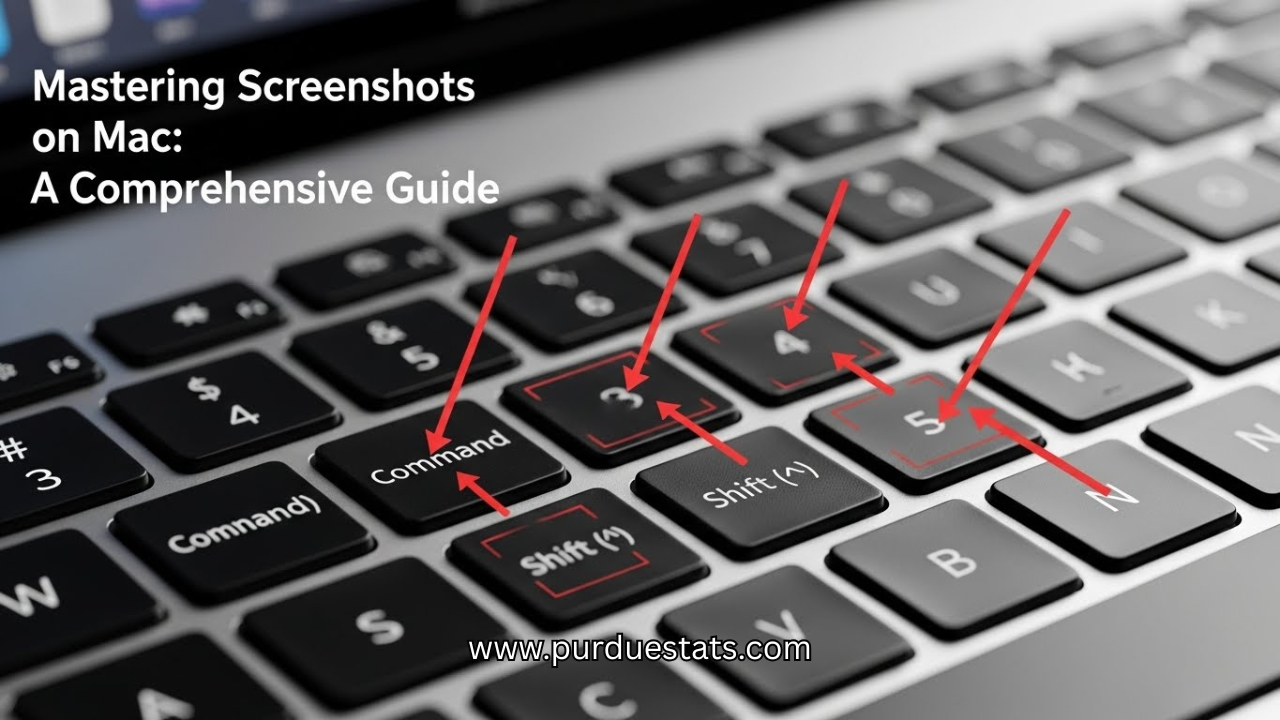
Taking a screenshot on a Mac is simple and quick. To capture your entire screen, just press Command + Shift + 3. This will automatically save the image to your desktop, ready for use.
If you only want to grab a specific window, hold down Command + Shift + 4, then press the Spacebar. Your cursor will turn into a camera icon; click on the window you’d like to capture.
For more control over what you’re capturing, pressing Command + Shift + 4 lets you select an area manually. Click and drag to create a rectangle around the portion of your screen that interests you. Release the mouse button when you’re done!
Taking Partial Screenshots
Taking partial screenshots on a Mac is incredibly straightforward. You can capture just the portion of your screen that you need, which saves time and keeps your files clutter-free. To do this, press Command + Shift + 4.
Once you hit these keys, your cursor will change to a crosshair. Click and drag over the area you want to capture. Release the mouse button or trackpad when you’re done selecting. It’s that simple.
After capturing, the screenshot will be saved automatically to your desktop or designated folder. This method allows for more control and precision in what you’re sharing or saving without including unnecessary details.
Saving and Locating Screenshots
When you take a screenshot on Mac, it’s automatically saved to your desktop by default. This makes it easy for quick access right after capturing an image. But as you accumulate screenshots, finding the one you need can become a challenge.
You can change the default save location if you’re looking for a more organized approach. Go to your Screenshot app settings and select another folder or create a new one specifically for screenshots.
Using Finder is another great way to locate your screenshots quickly. Simply search “Screenshot” in the Finder’s search bar, and all related images will pop up instantly, helping streamline your workflow without unnecessary hassle.
Clipboard vs. File for Screenshots
When you take a screenshot on Mac, you have the option to save it directly as a file or copy it to your clipboard. Choosing between these two methods can affect how you use your screenshots later.
Saving as a file creates an image that’s easy to locate in Finder and share with others. It also allows for quick access when needed, without worrying about pasting issues.
On the other hand, using the clipboard lets you quickly paste the screenshot into documents or emails. This is handy for immediate sharing but may require extra steps if you want to save it as a permanent file later on. Each method has its advantages based on your specific needs.
Screen Recording on Mac
Screen recording on a Mac is a powerful feature that allows you to capture video of your screen activity. This can be useful for tutorials, presentations, or simply sharing what’s happening on your display with others.
To start recording, press Command + Shift + 5. A toolbar will appear at the bottom of your screen giving you options to record the entire screen or just a selected portion. You can also choose where to save the recording and set up a timer if needed.
Once you’re ready, click “Record,” and then perform the actions you want to capture. When finished, stop the recording by clicking the stop button in the menu bar. Your video will automatically save to your designated location for easy access later.
Different File Formats for Screenshots
When taking a screenshot on Mac, you have various file formats to choose from. The default format is PNG, which offers high quality and lossless compression. This makes it ideal for images with text or sharp edges.
If you’re looking for smaller files, consider using JPEG. It’s perfect for photographs or detailed images where minor quality loss isn’t an issue. Keep in mind that JPEGs are compressed, so they might not be the best for graphics-heavy content.
Another option is TIFF, which provides excellent image quality and supports multiple layers. It’s great for professional use but tends to create larger file sizes. Knowing these options helps ensure your screenshots meet your needs effectively.
Touch Bar and MacBook Pro Screenshots
The Touch Bar on MacBook Pro offers a unique way to capture screenshots. It provides quick access to screenshot tools with just a tap. This makes the process highly intuitive and user-friendly.
To take a screenshot using the Touch Bar, you simply need to customize it first. Access System Preferences, then choose Keyboard and Customize Control Strip. You can add the Screenshot button for easy access.
Once added, capturing your screen is as simple as tapping the button and selecting your desired option—full screen, window, or selected portion. The flexibility of this feature enhances efficiency for users who frequently need screenshots on Mac.
Advanced Techniques: Command Line and Shortcut Keys
Mastering the command line for screenshots on your Mac can elevate your efficiency. Using Terminal, you can take screenshots with precise parameters. This is particularly useful for automation and batch processing.
Shortcut keys are another powerful tool at your disposal. Familiarizing yourself with combinations like Command + Shift + 3 or Command + Shift + 4 allows you to capture full screens or specific areas quickly. These shortcuts save time and streamline your workflow.
For power users, creating custom keyboard shortcuts offers even more flexibility. Simply navigate to System Preferences and set up personalized key combinations that suit your preferences. This level of customization enhances productivity, making screenshot tasks feel effortless.
Pasting Screenshots from Clipboard into Documents
Pasting screenshot on mac directly from the clipboard into your documents is a breeze on a Mac. After capturing your screenshot using keyboard shortcuts, it’s stored temporarily in your clipboard. To paste it, simply navigate to the document where you want the image—be it Word, Pages, or an email—and press Command + V.
You’ll see your screenshot appear instantly in the desired location. This method is especially useful for quick tasks or when you need to share information without saving multiple files first. It streamlines your workflow and keeps everything organized within one document.
Experiment with this feature and watch how effortlessly you can incorporate visuals into your work!